At jnaapti, we have been using containerization technologies since almost the very early days. In 2011, when I was evaluating a solution to provide light-weight containers to our learners in the Virtual Coach, I was told that the only mature solution was to use Virtualization solutions. But Virtualization was too slow (in terms of boot up time) and I didn’t have enough resources to keep stand-by nodes running all the time. So after some evaluation, I decided to use LXC and it served its purpose. However, there were several features missing and I was in the verge of building a few of them myself.
So it’s not surprising that when I discovered Docker, I just fell in love with it. One of the first things we did was we moved our LXC based learner containers to Docker. We then slowly started to migrate portions of our infrastructure to Docker. We achieved full Docker migration last November, and then also moved our staging/testing systems in the cloud to Docker.
The last in the list was to migrate our development environments. The initial migration wasn’t too hard, because of 2 things:
- We already had Docker in production – so it was a matter of working off our production Dockerfiles
- We were already using KVM in our development – so we already had a clear idea about what containers our system should be running.
Why the move away from KVM based development environments? Simple! KVM’s disk usage is too much to suit our requirements. We had our development images of 5G each and you have 10’s of such images and are soon out of disk space. I am not sure how many Docker fans will approve some of the things I discuss here but I believe that this is a much leaner solution than using Virtualization and I don’t see any issues in the way I am doing it.
So with the migration from KVM to Docker, there were a few additional things that I wanted to handle:
- Can we use Desktop tools like text-editors with data in Docker? Imagine I am writing a NodeJS application. I want to use Atom installed in my host to write code. However, I want to run NodeJS inside the container.
- It is very easy to work with command line utilities (which don’t need X) in containers, but how about Desktop utilities like Eclipse? Can we run this in a Docker container and still have the same user experience as a regular app? What are some best practices to do so?
- Is it possible to expose devices into Docker containers – this is required for eg, if we are doing Android development and want to debug our app in an actual Android device
The first 2 were rather easy and I sailed through it. The third one, I struggled a little, but I finally made some head-way.
This post attempts to capture some of my learnings in this entire process in case you want to build a similar environment. So let me answer these questions:
Using Desktop tools with Docker containers
This one is easy. A practice we follow is all the code that we write is inside a mounted volume. Containers are used to run processes in a contained fashion, but the processes are manipulating files that are in our host (and not in the underlying diff file system). We can as well remove our containers and we don’t lose anything.
Here is a sample run to demonstrate this:
Start a Docker container that has NodeJS installed in it. Make sure that this container has access to a local host directory (in this case /home/gautham/Desktop/node-data):
gautham@ananya:~|?  docker run -d -P -v /home/gautham/Desktop/node-data:/data --name "node-example" ananya-nodejs:0.0.1

820e105db5061b380e6117e42a0cabad5f00c54e54f5016aefc18399e2a2eb25
Check if the container is running
gautham@ananya:~|?  docker ps

CONTAINER ID        IMAGE                 COMMAND               CREATED             STATUS              PORTS                                                                   NAMES

820e105db506        ananya-nodejs:0.0.1   "/usr/sbin/sshd -D"   9 seconds ago       Up 8 seconds        0.0.0.0:49155->22/tcp                                                   node-example

Inside the container (which is accessible via SSH):
gautham@ananya:~|?  ssh -p 49155 ubuntu@localhost

ubuntu@localhost's password:

Last login: Tue Apr 14 14:13:12 2015 from 172.17.42.1

ubuntu@820e105db506:~$ cd /data/

ubuntu@820e105db506:/data$ ls

hello.js

ubuntu@820e105db506:/data$ node hello.js

Hello World!
Using Desktop tools inside Docker containers
This one initially seemed a little difficult, but I figured out soon.
Create an image that has lxde-core package installed in it.
Now, there are 2 options:
Connect to lxde running inside the Docker container
Run these commands in host:
docker run -d -P ananya-desktop:0.0.1

sudo su

xinit -- :1 &
This will now switch you to a different terminal (accessible at Ctrl+Alt+F8). You will also see a white terminal. Type the following in this terminal to start LXDE:
docker ps

CONTAINER ID        IMAGE                  COMMAND               CREATED             STATUS              PORTS                                                                   NAMES

38280dd66b98        ananya-android:0.0.1   "/usr/sbin/sshd -D"   4 minutes ago       Up 4 minutes        0.0.0.0:49156->22/tcp, 0.0.0.0:49157->5901/tcp                          hopeful_lumiere

ssh -X -p 49156 ubuntu@localhost
In the Docker container run
startlxde
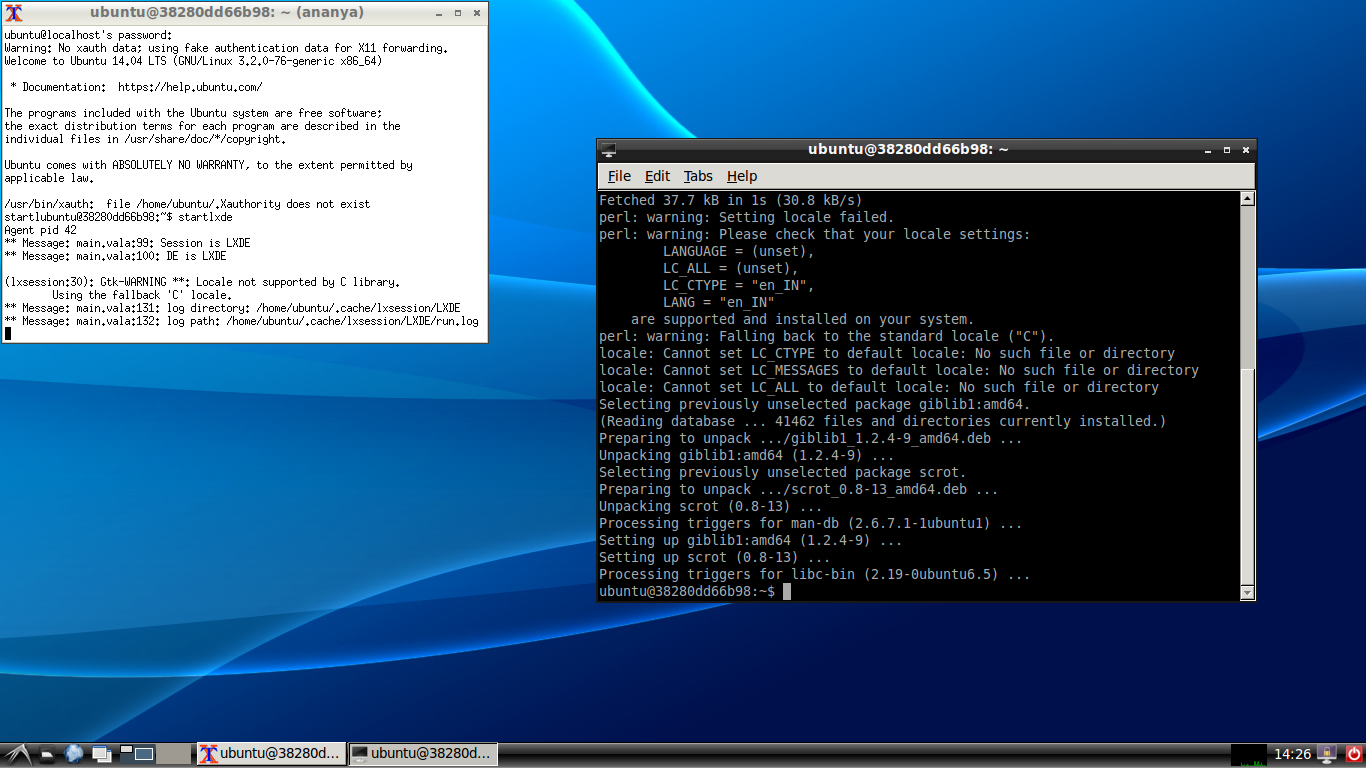
You should now see a full fledged Desktop running like this!

So your host is running at Ctrl+Alt+F7 and your Docker container is at Ctrl+Alt+F8. Use this option in case you are running many Desktop applications and you want to be totally isolated from the host when working with the applications in the container (i.e you are not using any host applications in conjunction with the applications in the Docker container).
Only run the application that you are interested in
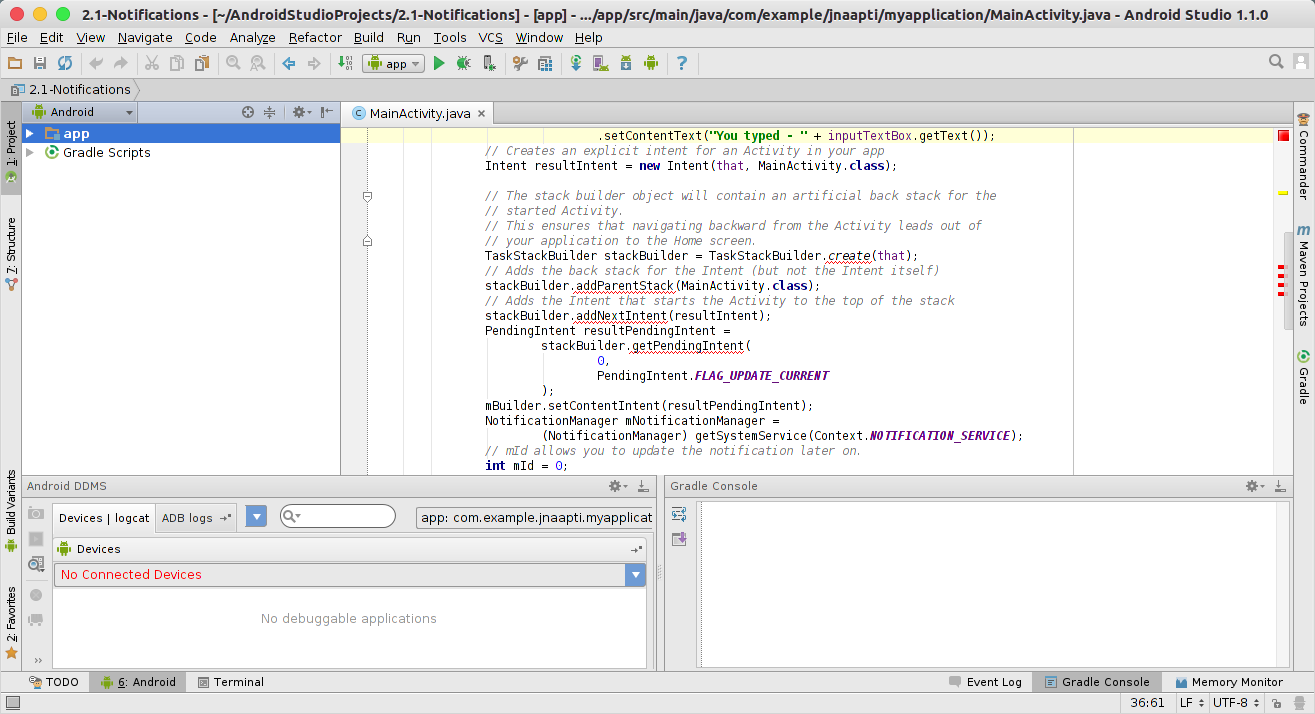
I found this option to be better in some ways. I have my Android Studio setup using this option now.
gautham@ananya:~|?  docker run -d -P ananya-desktop:0.0.1

gautham@ananya:~|?  ssh -X -p 49156 ubuntu@localhost

ubuntu@localhost's password:

Welcome to Ubuntu 14.04.2 LTS (GNU/Linux 3.16.0-34-generic x86_64)
* Documentation: https://help.ubuntu.com/
Last login: Tue Apr 14 14:25:47 2015 from 172.17.42.1
ubuntu@38280dd66b98:~$ cd android-studio/
ubuntu@38280dd66b98:~/android-studio$ ls
ubuntu@38280dd66b98:~/android-studio$ bin/studio.sh
And lo and behold!

Accessing devices within Docker container
A final requirement was whether we can get Docker to detect USB devices. I found that if you pass a –privileged flag and mount the /dev/ device appropriately, you can then access it in the Docker container. I was able to successfully use adb along with my Docker container.
docker run --privileged -v /data:/data -v /dev/bus/usb:/dev/bus/usb -d -P ananya-android:0.0.1
Docker has been a boon and although there are several area of improvement, I see that it has a future. It has become an indispensable tool in our software tools arsenal in jnaapti.
Cross-posted here: http://buzypi.in/2015/04/14/a-docker-based-development-environment/


